Tute 3 Answers
1. Discuss the importance of maintaining the quality of the code, explaining the different aspects of the code quality
Code quality is a vague definition. What do we consider high quality and what’s low quality?
Code quality is rather a group of different attributes and requirements, determined and prioritized by your business.
These requirements have to be defined with your offshore team in advance to make sure you’re on the same side.

Source: Codinghorror
Here are the main attributes that can be used to determine code quality:
- Clarity: Easy to read and oversee for anyone who isn’t the creator of the code. If it’s easy to understand, it’s much easier to maintain and extend the code. Not just computers, but also humans need to understand it.
- Maintainable: A high-quality code isn’t overcomplicated. Anyone working with the code has to understand the whole context of the code if they want to make any changes.
- Documented: The best thing is when the code is self-explaining, but it’s always recommended to add comments to the code to explain its role and functions. It makes it much easier for anyone who didn’t take part in writing the code to understand and maintain it.
- Refactored: Code formatting needs to be consistent and follow the language’s coding conventions.
- Well-tested: The less bugs the code has the higher its quality is. Thorough testing filters out critical bugs ensuring that the software works the way it’s intended.
- Extendible: The code you receive has to be extendible. It’s not really great when you have to throw it away after a few weeks.
- Efficiency: High-quality code doesn’t use unnecessary resources to perform a desired action.

Source: XKCD
A quality code does not necessarily meet all of the above-mentioned attributes, but the more it meets, the higher its quality. These requirements are more like a priority list that depends on the characteristics of your business.
If you get excited by quantitative measurement and want to put metrics behind code quality measurement, you could apply the following software metrics:
- Weighted Micro Function Points
- Halstead complexity measures
- Cyclomatic complexity
According to the State of Code Quality 2016 survey, the top 3 ways to ensure code quality are:
- Regular code reviews
- Unit testing
- Functional testing
In fact, half of the respondents are doing meeting-based code review and 72% of them are doing “over the shoulder” code review while 63% of the respondents are doing tool-based code review
In the following part, we will show you how to hold regular code and progress reviews with your remote team to ensure they do things that matter in the desired quality.
2. Explain different approaches and measurements used to measure the quality of code
Code quality is a vague definition. What do we consider high quality and what’s low quality?
Code quality is rather a group of different attributes and requirements, determined and prioritized by your business.
These requirements have to be defined with your offshore team in advance to make sure you’re on the same side.
Source: Codinghorror
Here are the main attributes that can be used to determine code quality:
- Clarity: Easy to read and oversee for anyone who isn’t the creator of the code. If it’s easy to understand, it’s much easier to maintain and extend the code. Not just computers, but also humans need to understand it.
- Maintainable: A high-quality code isn’t overcomplicated. Anyone working with the code has to understand the whole context of the code if they want to make any changes.
- Documented: The best thing is when the code is self-explaining, but it’s always recommended to add comments to the code to explain its role and functions. It makes it much easier for anyone who didn’t take part in writing the code to understand and maintain it.
- Refactored: Code formatting needs to be consistent and follow the language’s coding conventions.
- Well-tested: The less bugs the code has the higher its quality is. Thorough testing filters out critical bugs ensuring that the software works the way it’s intended.
- Extendible: The code you receive has to be extendible. It’s not really great when you have to throw it away after a few weeks.
- Efficiency: High-quality code doesn’t use unnecessary resources to perform a desired action.
Source: XKCD
A quality code does not necessarily meet all of the above-mentioned attributes, but the more it meets, the higher its quality. These requirements are more like a priority list that depends on the characteristics of your business.
If you get excited by quantitative measurement and want to put metrics behind code quality measurement, you could apply the following software metrics:
- Weighted Micro Function Points
- Halstead complexity measures
- Cyclomatic complexity
According to the State of Code Quality 2016 survey, the top 3 ways to ensure code quality are:
- Regular code reviews
- Unit testing
- Functional testing
In fact, half of the respondents are doing meeting-based code review and 72% of them are doing “over the shoulder” code review while 63% of the respondents are doing tool-based code review
In the following part, we will show you how to hold regular code and progress reviews with your remote team to ensure they do things that matter in the desired quality.
Source: Osnews
The best way to measure test effectiveness is to track test coverage. It shows what portion (%) of the code is covered by the testing algorithm. To get a better understanding, it’s worth breaking down test coverage:
- Statement coverage (%): number of statements executed during a test divided by all statements
- Branch coverage (%): number of executed conditions divided by all conditions
- Function coverage (%): number of executed functions divided by all functions
- Lines coverage (%): number of lines ran during a test divided by all lines
Istanbul is a cool tool for measuring test coverage for JavaScript codebase.

3. Identify and compare some available tools to maintain the code quality
Best Code Review Tools in the Market
- Collaborator
- Review Assistant
- Codebrag
- Gerrit
- Codestriker
- Rhodecode
- Phabricator
- Crucible
- Veracode
- Review Board
Here we go with a brief review of the individual tool.
#1) Collaborator
 Collaborator is the most comprehensive peer code review tool, built for teams working on projects where code quality is critical.
- See code changes, identify defects, and make comments on specific lines. Set review rules and automatic notifications to ensure that reviews are completed on time.
- Custom review templates are unique to Collaborator. Set custom fields, checklists, and participant groups to tailor peer reviews to your team’s ideal workflow.
- Easily integrate with 11 different SCMs, as well as IDEs like Eclipse & Visual Studio
- Build custom review reports to drive process improvement and make auditing easy.
- Conduct peer document reviews in the same tool so that teams can easily align on requirements, design changes, and compliance burdens.
***********************
#2) Review Assistant
 Review Assistant is a code review tool. This code review plug-in helps you to create review requests and respond to them without leaving Visual Studio. Review Assistant supports TFS, Subversion, Git, Mercurial, and Perforce. Simple setup: up and running in 5 minutes.
Key features:
Review Assistant is a code review tool. This code review plug-in helps you to create review requests and respond to them without leaving Visual Studio. Review Assistant supports TFS, Subversion, Git, Mercurial, and Perforce. Simple setup: up and running in 5 minutes.
Key features:
- Flexible code reviews
- Discussions in code
- Iterative review with defect fixing
- Team Foundation Server integration
- Flexible email notifications
- Rich integration features
- Reporting and Statistics
- Drop-in Replacement for Visual Studio Code Review Feature and much more
***********************
#3) Codebrag

- Codebrag is a simple, light-weight, free and open source code review tool which makes the review entertaining and structured.
- Codebrag is used to solve issues like non-blocking code review, inline comments & likes, smart email notifications etc.
- With Codebrag one can focus on workflow to find out and eliminate issues along with joint learning and teamwork.
- Codebrag helps in delivering enhanced software using its agile code review.
- License for Codebrag open source is maintained by AGPL.
***********************
#4) Gerrit

- Gerrit is a free web-based code review tool used by the software developers to review their code on a web-browser and reject or approve the changes.
- Gerrit can be integrated with Git which is a distributed Version Control System.
- Gerrit provides repository management for Git.
- Using Gerrit, project members can use rationalized code review process and also the extremely configurable hierarchy.
- Gerrit is also used in discussing a few detailed segments of the code and enhancing the right changes to be made.
***********************
#5) Codestriker

- Codestriker is an open source and free online code reviewing web application that assists the collaborative code review.
- Using Codestriker one can record the issues, comments, and decisions in a database which can be further used for code inspections.
- Codestriker supports traditional documents review. It can be integrated with ClearCase, Bugzilla, CVS etc.
- Codestriker is licensed under GPL.
***********************
#6) Rhodecode

- Rhodecode is an open source, protected and incorporated enterprise source code management tool.
- Rhodecode serves as an integrated tool for Git, Subversion, and Mercurial.
- Rhodecode main features are team collaboration, Repository Management, and Code security & authentication.
- Rhodecode has 2 editions, Community Edition (CE) which is a free and open source and Enterprise Edition (EE) is licensed per user.
- Rhodecode automates the workflows to execute faster.
***********************
#7) Phabricator

Phabricator is a complete suite of open-source software development applications which include light-weight web-based code review, planning, testing, browsing and audit score, finding bugs etc.
- Code review tool from Phabricator suite is termed as “Differential”. It is used in minimizing the efforts required in creating the best quality code.
- Phabricator has two types of code review workflows, namely “pre-push” also termed as “review” and “post-push” termed as “audit”.
- Phabricator can be integrated with Git, Subversion, and Mercurial.
***********************
#8) Crucible
 Crucible is a web-based collaborative code review application used by developers for code review, finding defects, discussing the changes and knowledge sharing etc.
- Crucible is a flexible application that accommodates ample range of work approaches and team sizes.
- Crucible is a lightweight peer code review tool that is used in pre-commit and post-commit reviews.
- Code review has become easy for SVN, Perforce, and CVS etc using Crucible.
***********************
#9) Veracode
 Veracode (now acquired by CA Technologies) is a company which delivers various solutions for automated & on-demand application security testing, automated code review etc.
- Veracode is used by the developers in creating secured software by scanning the binary code or byte code in place of source code.
- Using Veracode one can identify the improper encrypted functionalities, malicious code and backdoors from source code.
- Veracode can review a large amount of code and returns the results immediately.
- To use Veracode there is no need to buy any software or hardware, you just need to pay for the analysis services you need.
***********************
#10) Review Board
 Review Board is a web-based, collaborative, free and open source tool used for code review and document review by open source projects and companies.
- Using Review Board for code review one can save money and time. Time saved can be used in concentrating on creating great software.
- Review Board can be integrated with ClearCase, CVS, Perforce, Plastic etc.
- In a code review by Review Board tool, the code is syntax highlighted which makes it be read faster.
- Review Board supports pre-commit reviews and post-commit reviews.
4. Discuss the need for dependency/package management tools in software development?
1. NuGet
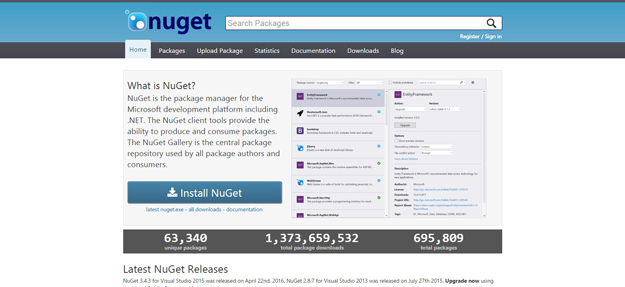
NuGet is the package manager for the Microsoft development platform including .NET. The NuGet client tools provide the ability to produce and consume packages. The NuGet Gallery is the central package repository used by all package authors and consumers.
When you use NuGet to install a package, it copies the library files to your solution and automatically updates your project (add references, change config files, etc.). If you remove a package, NuGet reverses whatever changes it made so that no clutter is left.
NuGet is the package manager for the Microsoft development platform including .NET. The NuGet client tools provide the ability to produce and consume packages. The NuGet Gallery is the central package repository used by all package authors and consumers.
2. Composer
This dependency manager for PHP lets you create a composer.json file in your project root, run a single command, and all your dependencies are downloaded ready to use.
Composer is not a package manager in the same sense as Yum or Apt are. Yes, it deals with “packages” or libraries, but it manages them on a per-project basis, installing them in a directory (e.g. vendor) inside your project. By default it does not install anything globally. Thus, it is a dependency manager. It does however support a “global” project for convenience via the global command.
This dependency manager for PHP lets you create a composer.json file in your project root, run a single command, and all your dependencies are downloaded ready to use.
3. David
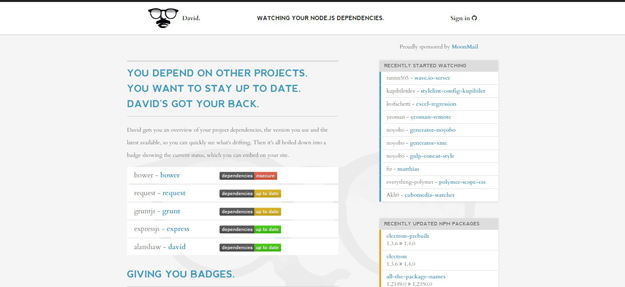
David is a tool for getting an overview of your Node dependencies. It creates a badge showing the current status of each dependency, which you can embed on your website if you choose.
David is a tool for getting an overview of your Node dependencies. It creates a badge showing the current status of each dependency, which you can embed on your website if you choose.
4. Nanny
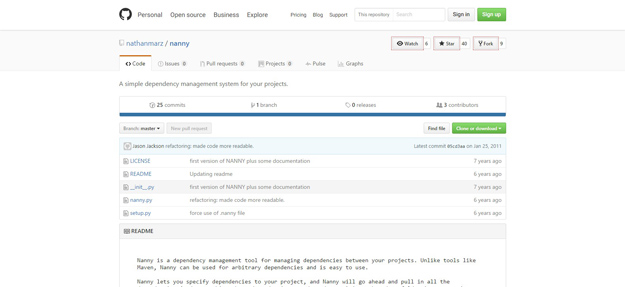
Nanny is a dependency management tool for managing dependencies between your projects. Unlike tools like Maven, Nanny can be used for arbitrary dependencies and is easy to use.
Nanny lets you specify dependencies to your project, and Nanny will go ahead and pull in all the dependencies (and everything those dependencies are dependent on) into the _deps folder in your project. Nanny makes it easy to create dependencies and manage dependency versions.
Nanny is a dependency management tool for managing dependencies between your projects. Unlike tools like Maven, Nanny can be used for arbitrary dependencies and is easy to use.
5. Bower

Bower is a package manager for the web. Bower lets you easily install assets such as images, CSS and JavaScript, and manages dependencies for you.
Bower can manage components that contain HTML, CSS, JavaScript, fonts or even image files. Bower doesn’t concatenate or minify code or do anything else – it just installs the right versions of the packages you need and their dependencies.
6. Sprockets
Sprockets is a Ruby library for compiling and serving web assets. It features declarative dependency management for JavaScript and CSS assets, as well as a powerful preprocessor pipeline that allows you to write assets in languages like CoffeeScript, Sass and SCSS.
Sprockets is a Ruby library for compiling and serving web assets. It features declarative dependency management for JavaScript and CSS assets, as well as a powerful preprocessor pipeline that allows you to write assets in languages like CoffeeScript, Sass and SCSS.
7. Pintjs

Pint is a small, asynchronous, dependency aware wrapper around Grunt attempting to solve some of the problems that accompany a build process at scale. A typical Gruntfile starts with, at a minimum, some variation of: jsHint, jasmine, LESS, handlebars, uglify, copy, and clean stack. Just these half dozen or so plugins can balloon your Gruntfile upwards of 300 lines and when you add complex concatenation, cache busting, and versioning can cause it to grow well in to the 1000+ lines. Pint allows you to break up and organize your build into small testable pieces.
Pint is a small, asynchronous, dependency aware wrapper around Grunt attempting to solve some of the problems that accompany a build process at scale. A typical Gruntfile starts with, at a minimum, some variation of: jsHint, jasmine, LESS, handlebars, uglify, copy, and clean stack. Just these half dozen or so plugins can balloon your Gruntfile upwards of 300 lines and when you add complex concatenation, cache busting, and versioning can cause it to grow well in to the 1000+ lines. Pint allows you to break up and organize your build into small testable pieces.
8. Ender.js
Ender is a full featured manager for your browser, it allows you to search, install, manage and compile front-end JavaScript packages and their dependencies for the web. Ender is not a jQuery replacement, nor its static asset, its a tool for making the consumption of front-end JavaScript packages dead simple and powerful.
With Ender, if one library goes bad or unmaintained, it can be replaced with another.
Ender is a full featured manager for your browser, it allows you to search, install, manage and compile front-end JavaScript packages and their dependencies for the web. Ender is not a jQuery replacement, nor its static asset, its a tool for making the consumption of front-end JavaScript packages dead simple and powerful.
9. Jam

Jam is a package manager for JavaScript. Unlike other repositories, they put the browser first. Using a stack of script tags isn’t the most maintainable way of managing dependencies; with Jam packages and loaders like RequireJS you get automatic dependency resolution.
You can achieve faster load times with asynchronous loading and the ability to optimize downloads. JavaScript modules and packages provide properly namespaced and more modular code.
Jam is a package manager for JavaScript. Unlike other repositories, they put the browser first. Using a stack of script tags isn’t the most maintainable way of managing dependencies; with Jam packages and loaders like RequireJS you get automatic dependency resolution.
10. Browserify
Browserify optimizes required modules and libraries by bundling them together. These bundles are supported in the browser which means you can include and merge modules with plain JavaScript. All you need is NPM to get started and then Browserify to get moving.
Browserify optimizes required modules and libraries by bundling them together. These bundles are supported in the browser which means you can include and merge modules with plain JavaScript. All you need is NPM to get started and then Browserify to get moving.
11. Volo

Volo is a tool for creating browser based, front end projects from project templates and add dependencies by fetching them from GitHub. Once your project is set up, automate common tasks.
volo is dependency manager and project creation tool that favors GitHub for the package repository. At its heart, volo is a generic command runner — you can create new commands for volo, and you can use commands others have created.
Volo is a tool for creating browser based, front end projects from project templates and add dependencies by fetching them from GitHub. Once your project is set up, automate common tasks.
12. GemLou.pe
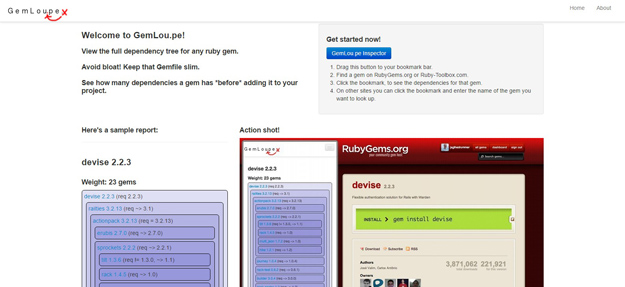
GemLou.pe is a bookmarklet that lets you easily view the full dependency tree for any Ruby gem before you install it. Use it directly from RubyGems.org or Ruby-Toolbox.com, or type in the name of the gem from anywhere else on the web.
GemLou.pe is a bookmarklet that lets you easily view the full dependency tree for any Ruby gem before you install it. Use it directly from RubyGems.org or Ruby-Toolbox.com, or type in the name of the gem from anywhere else on the web.
13. Mantri
Mantri is an open source and built for more complex web applications that require large bundles of dependencies. Mantri aims to follow modular programming practices and hopes to encourage developers onto the same path.
Mantri is an open source and built for more complex web applications that require large bundles of dependencies. Mantri aims to follow modular programming practices and hopes to encourage developers onto the same path.
14. PIP
pip is a package management system used to install and manage software packages written in Python
pip is a package management system used to install and manage software packages written in Python
15. NPM
npm is the package manager tool for JavaScript. Find, share, and reuse packages of code from hundreds of thousands of developers — and assemble them in powerful new ways. Dependencies can be updated and optimized right from the terminal. And you can build new projects with dependency files and version numbers automatically pulled from the package.json file.
npm is the package manager tool for JavaScript. Find, share, and reuse packages of code from hundreds of thousands of developers — and assemble them in powerful new ways. Dependencies can be updated and optimized right from the terminal. And you can build new projects with dependency files and version numbers automatically pulled from the package.json file.
5. Explain the role of dependency/package management tools in software development
Nearly a decade after Fowler's advice, there are dependency management tools for all major programming languages (for a list of appropriate dependency management tools by language, see Nicola Paolucci's blog on Git and project dependencies). Despite the availability of dependency management tools, many developers still believe there is only a simple dichotomy of "inside your project, or installed on your build server." Instead of manually managing multiple versions of libraries in either place, dependency management tools provide an explicit, repeatable, and reliable procedure for obtaining any given version. In short, dependency management tools move the responsibility of managing third-party libraries from the code repository to the automated build.
Typically dependency management tools use a single file to declare all library dependencies, making it much easier to see all libraries and their versions at once. That means it is sufficient to check-in references to the libraries, without storing the files themselves. This is convenient for newer distributed version control systems (DVCS) because some do not handle large binary files efficiently. It also has the surprising side-effect of making the build process more transparent - developers can read which versions of external libraries are needed to run a build, instead of needing to inspect file names or internal properties. Even without reading the set of declared dependencies, dependency management tools typically automate answering, "Is this the latest version?" Thusly, dependency management tools enable more rapid integration of changes from third-party sources.
The biggest drawback of dependency management tools may be that there are so many to choose from. Unlike version control and continuous integration tooling, dependency management tools are specific to programming language. Compounding the differences by language, each tool works slightly differently, each with different quirks. Despite these flaws, it is worth taking the time to learn them and integrate them into version control and continuous integration flows. These dependency management tools and the practice of declaring dependencies instead of storing them provide an important advantage of rapidly revealing integration problems from third-party libraries.
6. Compare and contrast different dependency/package management tools used in industry
Gradle vs. Maven
There are some fundamental differences in the way that the two systems approach builds. Gradle is based on a graph of task dependencies – in which tasks are the things that do the work – while Maven is based on a fixed and linear model of phases. With Maven, goals are attached to project phases, and goals serve a similar function to Gradle’s tasks, being the “things that do the work.”
Performance-wise, both allow for multi-module builds to run in parallel. However, Gradle allows for incremental builds because it checks which tasks are updated or not. If it is, then the task is not executed, giving you a much shorter build time. Other distinguishing performance features you can find on Gradle include:
- Incremental compilations for Java classes
- Compile avoidance for Java
- The use of APIs for incremental subtasks
- A compiler daemon that also makes compiling a lot faster
When it comes to managing dependencies, both Gradle and Maven can handle dynamic and transitive dependencies, to use third-party dependency caches, and to read POM metadata format. You can also declare library versions via central versioning definition and enforce central versioning. Both download transitive dependencies from their artifact repositories. Maven has Maven Central while Gradle has JCenter, and you can define your own private company repository as well. If there are several dependencies required, Maven can download these simultaneously.
Gradle, however, wins when it comes to API and implementation dependencies, as well as inherently allowing concurrent safe caches. It also keeps repository metadata along with cached dependencies, ensuring that two or more projects using the same cache will not overwrite each other, and it has a checksum-based cache and can synchronize cache with the repository. Furthermore, Gradle is compatible with IVY Metadata, allowing you to define custom rules to specify a version for a dynamic dependency, and resolving version conflicts. These are not available on Maven.
Other dependency management features that you can find only on Gradle are:
- The use of substitution rules for compatible libraries
- The use of ReplacedBy rules
- Better metadata resolution
- The ability to dynamically replace project dependencies with external ones, and vice versa
Gradle also gives you an easier time when working with composite builds, and it enables you to work with ad-hoc and permanent composite builds, as well as combine different builds and importing a composite build into Eclipse of IntelliJ IDEA.
As far as execution models are concerned, both have task groups and descriptions. Both enable you to build only the specified project and its dependencies. Gradle, however, has a fully configurable DAG, while with Maven, a goal can be attached only to one other goal. Multiple goals take on the form of an ordered list. Gradle also allows task exclusions, transitive exclusions, and task dependency inference. Gradle also has advanced features for task ordering and finalizers, among others.
Administering build infrastructure is another strong point for Gradle as it uses wrappers that accept auto provisioning, while with Maven, you need to have an extension to support self-provisioning builds. Gradle also enables you to configure version-based build environments without having to set these up manually. It also allows custom distributions.
Code Examples
In a comparison of Ant, Gradle, and Maven, Naresh Joshi compares the code required to create a build script that compiles, performs static analysis, runs unit tests, and creates JAR files at Programming Mitra.
Here’s the code required to achieve this with Maven:
<project xmlns="http://maven.apache.org/POM/4.0.0" xmlns:xsi="http://www.w3.org/2001/XMLSchema-instance" xsi:schemaLocation="http://maven.apache.org/POM/4.0.0 http://maven.apache.org/maven-v4_0_0.xsd">
<modelVersion>4.0.0</modelVersion>
<groupId>com.programming.mitra</groupId>
<artifactId>java-build-tools</artifactId>
<packaging>jar</packaging>
<version>1.0</version>
<dependencies>
<dependency>
<groupId>junit</groupId>
<artifactId>junit</artifactId>
<version>4.11</version>
</dependency>
</dependencies>
<build>
<plugins>
<plugin>
<groupId>org.apache.maven.plugins</groupId>
<artifactId>maven-compiler-plugin</artifactId>
<version>2.3.2</version>
</plugin>
</plugins>
</build>
</project>
To run the Maven goal that creates the JAR file, you would execute the following:
mvn package
Note that using this code, you’re setting the parameters but not specifying the tasks that must be carried out. You can add plugins (such as Maven CheckStyle, FindBugs and PMD) to execute the static analysis as a single target together with unit tests, but you’ll want to specify the path to the customs check style configuration to ensure that it fails on error, using code such as:
<plugin>
<groupId>org.apache.maven.plugins</groupId>
<artifactId>maven-checkstyle-plugin</artifactId>
<version>2.12.1</version>
<executions>
<execution>
<configuration>
<configLocation>config/checkstyle/checkstyle.xml</configLocation>
<consoleOutput>true</consoleOutput>
<failsOnError>true</failsOnError>
</configuration>
<goals>
<goal>check</goal>
</goals>
</execution>
</executions>
</plugin>
<plugin>
<groupId>org.codehaus.mojo</groupId>
<artifactId>findbugs-maven-plugin</artifactId>
<version>2.5.4</version>
<executions>
<execution>
<goals>
<goal>check</goal>
</goals>
</execution>
</executions>
</plugin>
<plugin>
<groupId>org.apache.maven.plugins</groupId>
<artifactId>maven-pmd-plugin</artifactId>
<version>3.1</version>
<executions>
<execution>
<goals>
<goal>check</goal>
</goals>
</execution>
</executions>
</plugin>
To run the goal to achieve this, execute the following:
mvn verify
It requires quite a bit of XML code to achieve some basic and common tasks, and for this reason, projects in Maven with a large number of tasks and dependencies can result in pom.xml files that consist of hundreds to thousands of lines of code.
To compare, here’s an example of build.gradle code that achieves a similar outcome:
apply plugin:'java'
apply plugin:'checkstyle'
apply plugin:'findbugs'
apply plugin:'pmd'
version ='1.0'
repositories {
mavenCentral()
}
dependencies {
testCompile group:'junit', name:'junit', version:'4.11'
}
This code is shorter and also introduces some useful tasks that aren’t covered with the Maven code above. Execute the following for a list of tasks that Gradle can run with the current configuration:
gradle tasks --all
7. What is a build tool? Indicate the significance of using a build tool in large scale software development, distinguishing it from small scale software development
Build tools are programs that automate the creation of executable applications from source code(eg. .apk for android app). Building incorporates compiling,linking and packaging the code into a usable or executable form.
Basically build automation is the act of scripting or automating a wide variety of tasks that software developers do in their day-to-day activities like:
- Downloading dependencies.
- Compiling source code into binary code.
- Packaging that binary code.
- Running tests.
- Deployment to production systems.
8. Explain the role of build automation in build tools indicating the need for build automation
In small projects, developers will often manually invoke the build process. This is not practical for larger projects, where it is very hard to keep track of what needs to be built, in what sequence and what dependencies there are in the building process. Using an automation tool allows the build process to be more consistent.
9. Compare and contrast different build tools used in industry
1. Gradle
 Your DevOps tool stack will need a reliable build tool. Apache Ant and Maven dominated the automated build tools market for many years, but Gradle showed up on the scene in 2009, and its popularity has steadily grown since then. Gradle is an incredibly versatile tool which allows you to write your code in Java, C++, Python, or other languages. Gradle is also supported by popular IDEs such as Netbeans, Eclipse, and IntelliJ IDEA. If that doesn’t convince you, it might help to know that Google also chose it as the official build tool for Android Studio.
While Maven and Ant use XML for configuration, Gradle introduces a Groovy-based DSL for describing builds. In 2016, the Gradle team also released a Kotlin-based DSL, so now you can write your build scripts in Kotlin as well. This means that Gradle does have some learning curves, so it can help a lot if you have used Groovy, Kotlin or another JVM language before. Besides, Gradle uses Maven’s repository format, so dependency management will be familiar if you have prior experience with Maven. You can also import your Ant builds into Gradle.
The best thing about Gradle is incremental builds, as they save a nice amount of compile time. According to Gradle’s performance measurements, it’s up to 100 times faster than Maven. This is in part because of incrementality, but also due to Gradle’s build cache and daemon. The build cache reuses task outputs, while the Gradle Daemon keeps build information hot in memory in-between builds.
All in all, Gradle allows faster shipping and comes with a lot of configuration possibilities.
Your DevOps tool stack will need a reliable build tool. Apache Ant and Maven dominated the automated build tools market for many years, but Gradle showed up on the scene in 2009, and its popularity has steadily grown since then. Gradle is an incredibly versatile tool which allows you to write your code in Java, C++, Python, or other languages. Gradle is also supported by popular IDEs such as Netbeans, Eclipse, and IntelliJ IDEA. If that doesn’t convince you, it might help to know that Google also chose it as the official build tool for Android Studio.
While Maven and Ant use XML for configuration, Gradle introduces a Groovy-based DSL for describing builds. In 2016, the Gradle team also released a Kotlin-based DSL, so now you can write your build scripts in Kotlin as well. This means that Gradle does have some learning curves, so it can help a lot if you have used Groovy, Kotlin or another JVM language before. Besides, Gradle uses Maven’s repository format, so dependency management will be familiar if you have prior experience with Maven. You can also import your Ant builds into Gradle.
The best thing about Gradle is incremental builds, as they save a nice amount of compile time. According to Gradle’s performance measurements, it’s up to 100 times faster than Maven. This is in part because of incrementality, but also due to Gradle’s build cache and daemon. The build cache reuses task outputs, while the Gradle Daemon keeps build information hot in memory in-between builds.
All in all, Gradle allows faster shipping and comes with a lot of configuration possibilities.
2. Git
 Git is one of the most popular DevOps tools, widely used across the software industry. It’s a distributed SCM (source code management) tool, loved by remote teams and open source contributors. Git allows you to track the progress of your development work. You can save different versions of your source code and return to a previous version when necessary. It’s also great for experimenting, as you can create separate branches and merge new features only when they’re ready to go.
To integrate Git with your DevOps workflow, you also need to host repositories where your team members can push their work. Currently, the two best online Git repo hosting services are GitHuband Bitbucket. GitHub is more well-known, but Bitbucket comes with free unlimited private repos for small teams (up to five team members). With GitHub, you get access only to public repos for free—which is still a great solution for many projects.
Both GitHub and Bitbucket have fantastic integrations. For example, you can integrate them with Slack, so everyone on your team gets notified whenever someone makes a new commit.
Git is one of the most popular DevOps tools, widely used across the software industry. It’s a distributed SCM (source code management) tool, loved by remote teams and open source contributors. Git allows you to track the progress of your development work. You can save different versions of your source code and return to a previous version when necessary. It’s also great for experimenting, as you can create separate branches and merge new features only when they’re ready to go.
To integrate Git with your DevOps workflow, you also need to host repositories where your team members can push their work. Currently, the two best online Git repo hosting services are GitHuband Bitbucket. GitHub is more well-known, but Bitbucket comes with free unlimited private repos for small teams (up to five team members). With GitHub, you get access only to public repos for free—which is still a great solution for many projects.
Both GitHub and Bitbucket have fantastic integrations. For example, you can integrate them with Slack, so everyone on your team gets notified whenever someone makes a new commit.
3. Jenkins
 Jenkins is the go-to DevOps automation tool for many software development teams. It’s an open source CI/CD server that allows you to automate the different stages of your delivery pipeline. The main reason for Jenkins’ popularity is its huge plugin ecosystem. Currently, it offers more than 1,000 plugins, so it integrates with almost all DevOps tools, from Docker to Puppet.
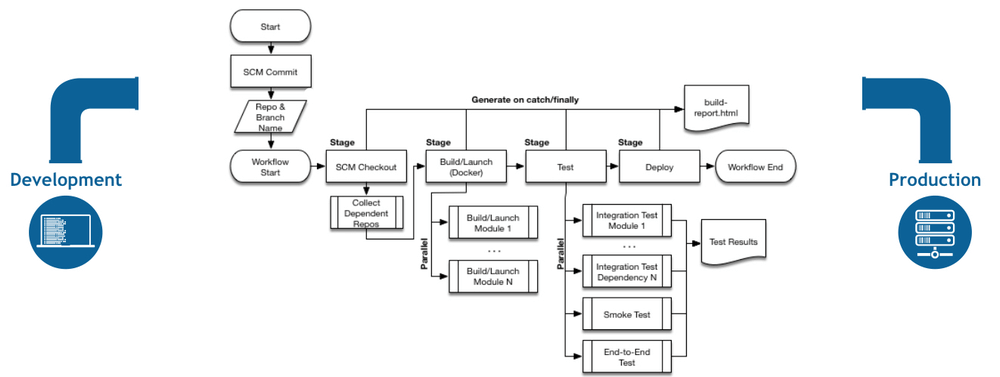
With Jenkins, you can set up and customize your CI/CD pipeline according to your own needs. I found the following example in the Jenkins Docs. And, this is just one of the possibilities. Nice, isn’t it?
Jenkins is the go-to DevOps automation tool for many software development teams. It’s an open source CI/CD server that allows you to automate the different stages of your delivery pipeline. The main reason for Jenkins’ popularity is its huge plugin ecosystem. Currently, it offers more than 1,000 plugins, so it integrates with almost all DevOps tools, from Docker to Puppet.
With Jenkins, you can set up and customize your CI/CD pipeline according to your own needs. I found the following example in the Jenkins Docs. And, this is just one of the possibilities. Nice, isn’t it?
 It’s easy to get started with Jenkins, as it runs out-of-the-box on Windows, Mac OS X, and Linux. You can also easily install it with Docker. You can set up and configure your Jenkins server through a web interface. If you are a first-time user, you can choose to install it with frequently used plugins. However, you can create your own custom config as well.
With Jenkins, you can iterate and deploy new code as quickly as possible. It also allows you to measure the success of each step of your pipeline. I’ve heard people complaining about Jenkins’ “ugly” and non-intuitive UI. However, I could still find everything I wanted without any problem.
It’s easy to get started with Jenkins, as it runs out-of-the-box on Windows, Mac OS X, and Linux. You can also easily install it with Docker. You can set up and configure your Jenkins server through a web interface. If you are a first-time user, you can choose to install it with frequently used plugins. However, you can create your own custom config as well.
With Jenkins, you can iterate and deploy new code as quickly as possible. It also allows you to measure the success of each step of your pipeline. I’ve heard people complaining about Jenkins’ “ugly” and non-intuitive UI. However, I could still find everything I wanted without any problem.
4. Bamboo
 Bamboo is Atlassian’s CI/CD server solution that has many similar features to Jenkins. Both are popular DevOps tools that allow you to automate your delivery pipeline, from builds to deployment. However, while Jenkins is open source, Bamboo comes with a price tag. So, here’s the eternal question: is it worth choosing proprietary software if there’s a free alternative? It depends on your budget and goals.
Bamboo has many pre-built functionalities that you have to set up manually in Jenkins. This is also the reason why Bamboo has fewer plugins (around 100 compared to Jenkins’ 1000+). In fact, you don’t need that many plugins with Bamboo, as it does many things out-of-the-box.
Bamboo seamlessly integrates with other Atlassian products such as Jira and Bitbucket. You also have access to built-in Git and Mercurial branching workflows and test environments. All in all, Bamboo can save you a lot of configuration time. It also comes with a more intuitive UI with tooltips, auto-completion, and other handy features.
Bamboo is Atlassian’s CI/CD server solution that has many similar features to Jenkins. Both are popular DevOps tools that allow you to automate your delivery pipeline, from builds to deployment. However, while Jenkins is open source, Bamboo comes with a price tag. So, here’s the eternal question: is it worth choosing proprietary software if there’s a free alternative? It depends on your budget and goals.
Bamboo has many pre-built functionalities that you have to set up manually in Jenkins. This is also the reason why Bamboo has fewer plugins (around 100 compared to Jenkins’ 1000+). In fact, you don’t need that many plugins with Bamboo, as it does many things out-of-the-box.
Bamboo seamlessly integrates with other Atlassian products such as Jira and Bitbucket. You also have access to built-in Git and Mercurial branching workflows and test environments. All in all, Bamboo can save you a lot of configuration time. It also comes with a more intuitive UI with tooltips, auto-completion, and other handy features.
5. Docker
 Docker has been the number one container platform since its launch in 2013 and continues to improve. It’s also thought of as one of the most important DevOps tools out there. Docker has made containerization popular in the tech world, mainly because it makes distributed development possible and automates the deployment of your apps. It isolates applications into separate containers, so they become portable and more secure. Docker apps are also OS and platform independent. You can use Docker containers instead of virtual machines such as VirtualBox.
What I like the most about Docker is that you don’t have to worry about dependency management. You can package all dependencies within the app’s container and ship the whole thing as an independent unit. Then, you can run the app on any machine or platform without a headache.
Docker integrates with Jenkins and Bamboo, too. If you use it together with one of these automation servers, you can further improve your delivery workflow. Besides, Docker is also great for cloud computing. In recent years, all major cloud providers such as AWS and Google Cloud added support for Docker. So, if you are planning a cloud migration, Docker can ease the process for you.
Docker has been the number one container platform since its launch in 2013 and continues to improve. It’s also thought of as one of the most important DevOps tools out there. Docker has made containerization popular in the tech world, mainly because it makes distributed development possible and automates the deployment of your apps. It isolates applications into separate containers, so they become portable and more secure. Docker apps are also OS and platform independent. You can use Docker containers instead of virtual machines such as VirtualBox.
What I like the most about Docker is that you don’t have to worry about dependency management. You can package all dependencies within the app’s container and ship the whole thing as an independent unit. Then, you can run the app on any machine or platform without a headache.
Docker integrates with Jenkins and Bamboo, too. If you use it together with one of these automation servers, you can further improve your delivery workflow. Besides, Docker is also great for cloud computing. In recent years, all major cloud providers such as AWS and Google Cloud added support for Docker. So, if you are planning a cloud migration, Docker can ease the process for you.
6. Kubernetes
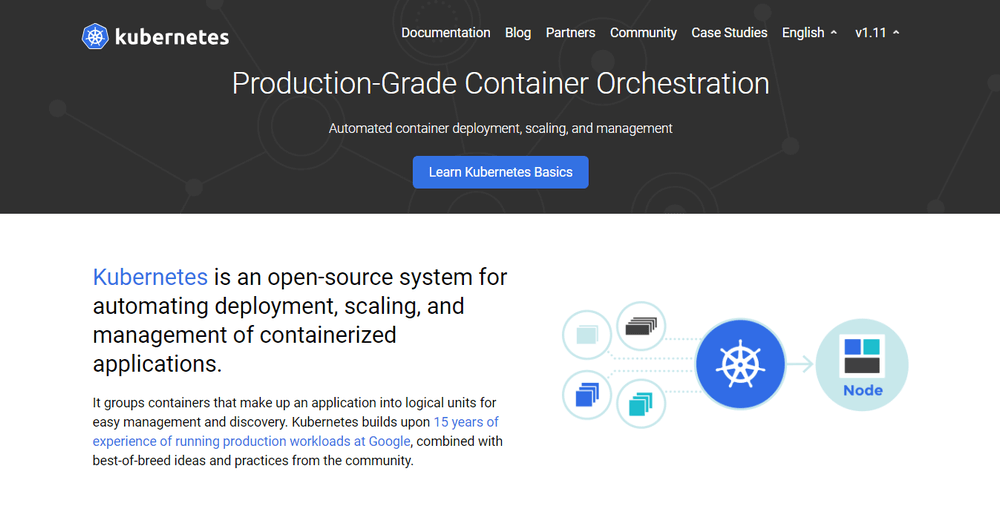 This year, everyone is talking about Kubernetes. It’s a container orchestration platform that takes containerization to the next level. It works well with Docker or any of its alternatives. Kubernetes is still very new; its first release came out in 2015. It was founded by a couple of Google engineers who wanted to find a solution to manage containers at scale. With Kubernetes, you can group your containers into logical units.
You may not need a container orchestration platform if you have just a few containers. However, it’s the next logical step when you reach a certain level of complexity and need to scale your resources. Kubernetes allows you to automate the process of managing hundreds of containers.
With Kubernetes, you don’t have to tie your containerized apps to a single machine. Instead, you can deploy it to a cluster of computers. Kubernetes automates the distribution and scheduling of containers across the whole cluster.
A Kubernetes cluster consists of one master and several worker nodes. The master node implements your pre-defined rules and deploys the containers to the worker nodes. Kubernetes pays attention to everything. For instance, it notices when a worker node is down and redistributes the containers whenever it’s necessary.
This year, everyone is talking about Kubernetes. It’s a container orchestration platform that takes containerization to the next level. It works well with Docker or any of its alternatives. Kubernetes is still very new; its first release came out in 2015. It was founded by a couple of Google engineers who wanted to find a solution to manage containers at scale. With Kubernetes, you can group your containers into logical units.
You may not need a container orchestration platform if you have just a few containers. However, it’s the next logical step when you reach a certain level of complexity and need to scale your resources. Kubernetes allows you to automate the process of managing hundreds of containers.
With Kubernetes, you don’t have to tie your containerized apps to a single machine. Instead, you can deploy it to a cluster of computers. Kubernetes automates the distribution and scheduling of containers across the whole cluster.
A Kubernetes cluster consists of one master and several worker nodes. The master node implements your pre-defined rules and deploys the containers to the worker nodes. Kubernetes pays attention to everything. For instance, it notices when a worker node is down and redistributes the containers whenever it’s necessary.
7. Puppet Enterprise
 Puppet Enterprise is a cross-platform configuration management platform. It allows you to manage your infrastructure as code. As it automates infrastructure management, you can deliver software faster and more securely. Puppet also provides developers with an open-source tool for smaller projects. However, if you are dealing with a larger infrastructure, you may find value in Puppet Enterprise’s extra features, such as:
- Real-time reports
- Role-based access control
- Node management
With Puppet Enterprise, you can manage multiple teams and thousands of resources. It automatically understands relationships within your infrastructure. It deals with dependencies and handles failures smartly. When it encounters a failed configuration, it skips all the dependent configurations as well. The best thing about Puppet is that it has more than 5,000 modules and integrates with many popular DevOps tools.
8. Ansible
 Ansible is a configuration management tool, similar to Puppet and Chef. You can use it to configure your infrastructure and automate deployment. Its main selling points compared to other similar DevOps tools are simplicity and ease of use. Ansible follows the same Infrastructure As Code (IAC) approach as Puppet. However, it uses the super simple YAML syntax. With Ansible, you can define tasks in YAML, while Puppet has its own declarative language.
Agentless architecture is another frequently mentioned feature of Ansible. As no daemons or agents run in the background, Ansible is a secure and lightweight solution for configuration management automation. Similar to Puppet, Ansible also has several modules.
If you want to better understand how Ansible fits into the DevOps workflow take a look at this postby the Red Hat Blog. It shows how to use Ansible for environment provisioning and application deployment within a Jenkins pipeline.
Ansible is a configuration management tool, similar to Puppet and Chef. You can use it to configure your infrastructure and automate deployment. Its main selling points compared to other similar DevOps tools are simplicity and ease of use. Ansible follows the same Infrastructure As Code (IAC) approach as Puppet. However, it uses the super simple YAML syntax. With Ansible, you can define tasks in YAML, while Puppet has its own declarative language.
Agentless architecture is another frequently mentioned feature of Ansible. As no daemons or agents run in the background, Ansible is a secure and lightweight solution for configuration management automation. Similar to Puppet, Ansible also has several modules.
If you want to better understand how Ansible fits into the DevOps workflow take a look at this postby the Red Hat Blog. It shows how to use Ansible for environment provisioning and application deployment within a Jenkins pipeline.
9. Nagios
 Nagios is one of the most popular free and open source DevOps monitoring tools. It allows you to monitor your infrastructure so that you can find and fix problems. With Nagios, you can keep records of events, outages, and failures. You can also keep an eye on trends with the help of Nagios’ graphs and reports. This way, you can forecast outages and errors and detect security threats.
Although there are many DevOps tools for infrastructure monitoring, Nagios stands out due to its rich plugin ecosystem. As Nagios has been around for a while (since 2002), there’s a vast community around it. Besides plugins, they also make add-ons, tutorials, translations, and other goodies—all for free.
Nagios offers four open source monitoring solutions:
Nagios is one of the most popular free and open source DevOps monitoring tools. It allows you to monitor your infrastructure so that you can find and fix problems. With Nagios, you can keep records of events, outages, and failures. You can also keep an eye on trends with the help of Nagios’ graphs and reports. This way, you can forecast outages and errors and detect security threats.
Although there are many DevOps tools for infrastructure monitoring, Nagios stands out due to its rich plugin ecosystem. As Nagios has been around for a while (since 2002), there’s a vast community around it. Besides plugins, they also make add-ons, tutorials, translations, and other goodies—all for free.
Nagios offers four open source monitoring solutions:
- Nagios Core
- Nagios XI
- Nagios Log Server
- Nagios Fusion
Nagios Core is a command line tool, with all the basic functionalities. You can also opt for Nagios XI that comes with a web-based GUI and monitoring wizard. Nagios writes a handy comparison of their capabilities.
Nagios Log Server lets you search log data and set up alerts about potential threats. And, Nagios Fusion allows you to monitor multiple networks at the same time.
On the whole, Nagios provides DevOps teams with an infrastructure monitoring solution. However, it can take a while to set it up and make it compatible with your environment.
10. Raygun
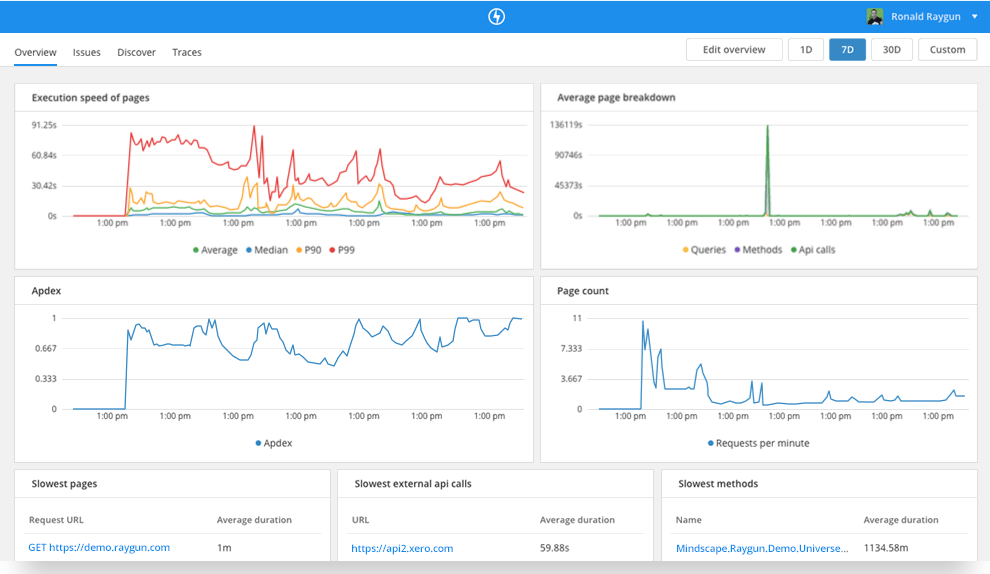 Raygun is a world-class error monitoring and crash reporting platform. Application performance monitoring (APM) is its most recent product. Raygun’s DevOps tool helps you diagnose performance issues and tracking them back to the exact line of code, function, or API call. The APM tool also fits well with Raygun’s error management workflow. For example, it automatically identifies your highest priority problems and creates issues for you.
Raygun APM can help you make the most out of other DevOps tools, as you are always notified about the problems. Since it automatically links errors back to the source code, Raygun brings Development and Operations together by providing one source of truth for the whole team the cause of errors and performance problems.
Raygun is a world-class error monitoring and crash reporting platform. Application performance monitoring (APM) is its most recent product. Raygun’s DevOps tool helps you diagnose performance issues and tracking them back to the exact line of code, function, or API call. The APM tool also fits well with Raygun’s error management workflow. For example, it automatically identifies your highest priority problems and creates issues for you.
Raygun APM can help you make the most out of other DevOps tools, as you are always notified about the problems. Since it automatically links errors back to the source code, Raygun brings Development and Operations together by providing one source of truth for the whole team the cause of errors and performance problems.
10. Explain the build life cycle, using an example (java, .net, etc…)
Maven is based around the central concept of a build lifecycle. What this means is that the process for building and distributing a particular artifact (project) is clearly defined.
For the person building a project, this means that it is only necessary to learn a small set of commands to build any Maven project, and the POM will ensure they get the results they desired.
There are three built-in build lifecycles: default, clean and site. The default lifecycle handles your project deployment, the clean lifecycle handles project cleaning, while the site lifecycle handles the creation of your project's site documentation.
A Build Lifecycle is Made Up of Phases
Each of these build lifecycles is defined by a different list of build phases, wherein a build phase represents a stage in the lifecycle.
For example, the default lifecycle comprises of the following phases (for a complete list of the lifecycle phases, refer to the Lifecycle Reference):
- validate - validate the project is correct and all necessary information is available
- compile - compile the source code of the project
- test - test the compiled source code using a suitable unit testing framework. These tests should not require the code be packaged or deployed
- package - take the compiled code and package it in its distributable format, such as a JAR.
- verify - run any checks on results of integration tests to ensure quality criteria are met
- install - install the package into the local repository, for use as a dependency in other projects locally
- deploy - done in the build environment, copies the final package to the remote repository for sharing with other developers and projects.
These lifecycle phases (plus the other lifecycle phases not shown here) are executed sequentially to complete the default lifecycle. Given the lifecycle phases above, this means that when the default lifecycle is used, Maven will first validate the project, then will try to compile the sources, run those against the tests, package the binaries (e.g. jar), run integration tests against that package, verify the integration tests, install the verified package to the local repository, then deploy the installed package to a remote repository.
[top].
Usual Command Line Calls
In a development environment, use the following call to build and install artifacts into the local repository.
mvn install
This command executes each default life cycle phase in order (validate, compile, package, etc.), before executing install. You only need to call the last build phase to be executed, in this case, install:
In a build environment, use the following call to cleanly build and deploy artifacts into the shared repository.
mvn clean deploy
The same command can be used in a multi-module scenario (i.e. a project with one or more subprojects). Maven traverses into every subproject and executes clean, then executes deploy(including all of the prior build phase steps).
[top].
A Build Phase is Made Up of Plugin Goals
However, even though a build phase is responsible for a specific step in the build lifecycle, the manner in which it carries out those responsibilities may vary. And this is done by declaring the plugin goals bound to those build phases.
A plugin goal represents a specific task (finer than a build phase) which contributes to the building and managing of a project. It may be bound to zero or more build phases. A goal not bound to any build phase could be executed outside of the build lifecycle by direct invocation. The order of execution depends on the order in which the goal(s) and the build phase(s) are invoked. For example, consider the command below. The clean and package arguments are build phases, while the dependency:copy-dependencies is a goal (of a plugin).
mvn clean dependency:copy-dependencies package
If this were to be executed, the clean phase will be executed first (meaning it will run all preceding phases of the clean lifecycle, plus the clean phase itself), and then the dependency:copy-dependencies goal, before finally executing the package phase (and all its preceding build phases of the default lifecycle).
Moreover, if a goal is bound to one or more build phases, that goal will be called in all those phases.
Furthermore, a build phase can also have zero or more goals bound to it. If a build phase has no goals bound to it, that build phase will not execute. But if it has one or more goals bound to it, it will execute all those goals
(Note: In Maven 2.0.5 and above, multiple goals bound to a phase are executed in the same order as they are declared in the POM, however multiple instances of the same plugin are not supported. Multiple instances of the same plugin are grouped to execute together and ordered in Maven 2.0.11 and above).
[top].
Some Phases Are Not Usually Called From the Command Line
The phases named with hyphenated-words (pre-*, post-*, or process-*) are not usually directly called from the command line. These phases sequence the build, producing intermediate results that are not useful outside the build. In the case of invoking integration-test, the environment may be left in a hanging state.
Code coverage tools such as Jacoco and execution container plugins such as Tomcat, Cargo, and Docker bind goals to the pre-integration-test phase to prepare the integration test container environment. These plugins also bind goals to the post-integration-test phase to collect coverage statistics or decommission the integration test container.
Failsafe and code coverage plugins bind goals to integration-test and verify phases. The net result is test and coverage reports are available after the verify phase. If integration-test were to be called from the command line, no reports are generated. Worse is that the integration test container environment is left in a hanging state; the Tomcat webserver or Docker instance is left running, and Maven may not even terminate by itself.
[top].
Setting Up Your Project to Use the Build Lifecycle
The build lifecycle is simple enough to use, but when you are constructing a Maven build for a project, how do you go about assigning tasks to each of those build phases?
The build lifecycle is simple enough to use, but when you are constructing a Maven build for a project, how do you go about assigning tasks to each of those build phases?
Packaging
The first, and most common way, is to set the packaging for your project via the equally named POM element <packaging>. Some of the valid packaging values are jar, war, ear and pom. If no packaging value has been specified, it will default to jar.
Each packaging contains a list of goals to bind to a particular phase. For example, the jar packaging will bind the following goals to build phases of the default lifecycle.
Phase plugin:goal process-resources resources:resources compile compiler:compile process-test-resources resources:testResources test-compile compiler:testCompile test surefire:test package jar:jar install install:install deploy deploy:deploy
This is an almost standard set of bindings; however, some packagings handle them differently. For example, a project that is purely metadata (packaging value is pom) only binds goals to the install and deploy phases (for a complete list of goal-to-build-phase bindings of some of the packaging types, refer to the Lifecycle Reference).
Note that for some packaging types to be available, you may also need to include a particular plugin in the <build> section of your POM and specify <extensions>true</extensions> for that plugin. One example of a plugin that requires this is the Plexus plugin, which provides a plexus-application and plexus-service packaging.
[top].
The first, and most common way, is to set the packaging for your project via the equally named POM element <packaging>. Some of the valid packaging values are jar, war, ear and pom. If no packaging value has been specified, it will default to jar.
Each packaging contains a list of goals to bind to a particular phase. For example, the jar packaging will bind the following goals to build phases of the default lifecycle.
| Phase | plugin:goal |
|---|---|
| process-resources | resources:resources |
| compile | compiler:compile |
| process-test-resources | resources:testResources |
| test-compile | compiler:testCompile |
| test | surefire:test |
| package | jar:jar |
| install | install:install |
| deploy | deploy:deploy |
This is an almost standard set of bindings; however, some packagings handle them differently. For example, a project that is purely metadata (packaging value is pom) only binds goals to the install and deploy phases (for a complete list of goal-to-build-phase bindings of some of the packaging types, refer to the Lifecycle Reference).
Note that for some packaging types to be available, you may also need to include a particular plugin in the <build> section of your POM and specify <extensions>true</extensions> for that plugin. One example of a plugin that requires this is the Plexus plugin, which provides a plexus-application and plexus-service packaging.
[top].
Plugins
The second way to add goals to phases is to configure plugins in your project. Plugins are artifacts that provide goals to Maven. Furthermore, a plugin may have one or more goals wherein each goal represents a capability of that plugin. For example, the Compiler plugin has two goals: compile and testCompile. The former compiles the source code of your main code, while the latter compiles the source code of your test code.
As you will see in the later sections, plugins can contain information that indicates which lifecycle phase to bind a goal to. Note that adding the plugin on its own is not enough information - you must also specify the goals you want to run as part of your build.
The goals that are configured will be added to the goals already bound to the lifecycle from the packaging selected. If more than one goal is bound to a particular phase, the order used is that those from the packaging are executed first, followed by those configured in the POM. Note that you can use the <executions> element to gain more control over the order of particular goals.
For example, the Modello plugin binds by default its goal modello:java to the generate-sources phase (Note: The modello:java goal generates Java source codes). So to use the Modello plugin and have it generate sources from a model and incorporate that into the build, you would add the following to your POM in the <plugins> section of <build>:
... <plugin> <groupId>org.codehaus.modello</groupId> <artifactId>modello-maven-plugin</artifactId> <version>1.8.1</version> <executions> <execution> <configuration> <models> <model>src/main/mdo/maven.mdo</model> </models> <version>4.0.0</version> </configuration> <goals> <goal>java</goal> </goals> </execution> </executions> </plugin> ...
You might be wondering why that <executions> element is there. That is so that you can run the same goal multiple times with different configuration if needed. Separate executions can also be given an ID so that during inheritance or the application of profiles you can control whether goal configuration is merged or turned into an additional execution.
When multiple executions are given that match a particular phase, they are executed in the order specified in the POM, with inherited executions running first.
Now, in the case of modello:java, it only makes sense in the generate-sources phase. But some goals can be used in more than one phase, and there may not be a sensible default. For those, you can specify the phase yourself. For example, let's say you have a goal display:time that echos the current time to the commandline, and you want it to run in the process-test-resources phase to indicate when the tests were started. This would be configured like so:
... <plugin> <groupId>com.mycompany.example</groupId> <artifactId>display-maven-plugin</artifactId> <version>1.0</version> <executions> <execution> <phase>process-test-resources</phase> <goals> <goal>time</goal> </goals> </execution> </executions> </plugin> ...
11. What is Maven, a dependency/package management tool or a build tool or something more?
Maven is a build automation tool used primarily for Java projects.
Maven addresses two aspects of building software: first, it describes how software is built,[clarification needed] and second, it describes its dependencies. Unlike earlier tools like Apache Ant, it uses conventions for the build procedure, and only exceptions need to be written down. An XML file describes the software project being built, its dependencies on other external modules and components, the build order, directories, and required plug-ins. It comes with pre-defined targets for performing certain well-defined tasks such as compilation of code and its packaging.
Maven dynamically downloads Java libraries and Maven plug-ins from one or more repositories such as the Maven 2 Central Repository, and stores them in a local cache.[3] This local cache of downloaded artifacts can also be updated with artifacts created by local projects. Public repositories can also be updated.
Maven can also be used to build and manage projects written in C#, Ruby, Scala, and other languages. The Maven project is hosted by the Apache Software Foundation, where it was formerly part of the Jakarta Project.
Maven is built using a plugin-based architecture that allows it to make use of any application controllable through standard input. Theoretically, this would allow anyone to write plugins to interface with build tools (compilers, unit test tools, etc.) for any other language. In reality, support and use for languages other than Java has been minimal. A plugin for the .NET framework exists and is maintained,[4] and a C/C++ native plugin is maintained for Maven 2
12. Discuss how Maven uses conventions over configurations, explaining Maven’s approach to manage the configurations
Maven uses Convention over Configuration, which means developers are not required to create build process themselves.
Developers do not have to mention each and every configuration detail. Maven provides sensible default behavior for projects. When a Maven project is created, Maven creates default project structure. Developer is only required to place files accordingly and he/she need not to define any configuration in pom.xml.
As an example, following table shows the default values for project source code files, resource files and other configurations. Assuming, ${basedir}denotes the project location −
| Item | Default |
|---|---|
| source code | ${basedir}/src/main/java |
| Resources | ${basedir}/src/main/resources |
| Tests | ${basedir}/src/test |
| Complied byte code | ${basedir}/target |
| distributable JAR | ${basedir}/target/classes |
In order to build the project, Maven provides developers with options to mention life-cycle goals and project dependencies (that rely on Maven plugin capabilities and on its default conventions). Much of the project management and build related tasks are maintained by Maven plugins.
Developers can build any given Maven project without the need to understand how the individual plugins work. We will discuss Maven Plugins in detail in the later chapters.
Maven defines 4 items of a build process:
-
Lifecycle
Three built-in lifecycles (aka build lifecycles):
default, clean, site. (Lifecycle Reference)
-
Phase
Each lifecycle is made up of phases, e.g. for the
default lifecycle: compile, test, package, install, etc.
-
Plugin
An artifact that provides one or more goals.
Based on packaging type (
jar, war, etc.) plugins' goals are bound to phases by default. (Built-in Lifecycle Bindings)
-
Goal
The task (action) that is executed. A plugin can have one or more goals.
One or more goals need to be specified when configuring a plugin in a POM. Additionally, in case a plugin does not have a default phase defined, the specified goal(s) can be bound to a phase.
Maven can be invoked with:
- a phase (e.g
clean, package)
<plugin-prefix>:<goal> (e.g. dependency:copy-dependencies)<plugin-group-id>:<plugin-artifact-id>[:<plugin-version>]:<goal> (e.g. org.apache.maven.plugins:maven-compiler-plugin:3.7.0:compile)
with one or more combinations of any or all, e.g.:
mvn clean dependency:copy-dependencies package
14. Discuss with examples, how Maven manages dependency/packages and build life cycle
Lifecycle
Three built-in lifecycles (aka build lifecycles):
default, clean, site. (Lifecycle Reference)
Phase
Each lifecycle is made up of phases, e.g. for the
default lifecycle: compile, test, package, install, etc.
Plugin
An artifact that provides one or more goals.
Based on packaging type (
jar, war, etc.) plugins' goals are bound to phases by default. (Built-in Lifecycle Bindings)
Goal
The task (action) that is executed. A plugin can have one or more goals.
One or more goals need to be specified when configuring a plugin in a POM. Additionally, in case a plugin does not have a default phase defined, the specified goal(s) can be bound to a phase.
clean, package)<plugin-prefix>:<goal> (e.g. dependency:copy-dependencies)<plugin-group-id>:<plugin-artifact-id>[:<plugin-version>]:<goal> (e.g. org.apache.maven.plugins:maven-compiler-plugin:3.7.0:compile)mvn clean dependency:copy-dependencies package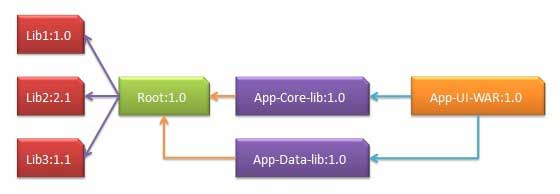

Comments
Post a Comment